Imagine this – a plate of comfort food with little wisps of steam and maybe even a dollop of ghee or butter melting away on top of your feast for one. The camera deserves to eat first when it comes to a meal like this, right? Well, unfortunately most dishes like that – our humble plates of ghar ka khana – rarely ever make it to the ‘gram.
This got me thinking – maybe we’d see more homemade food on social media if we knew just how to get their pictures right!
I write this as I bask in undeserved praise from my family for being a great home cook. Well… If I’m being honest, my food doesn’t actually taste as good as the pictures that I send on the family WhatsApp group look like. (Oops ?). I’ve just nailed how to take photos of my lunches, and what better time than a lockdown to share that knowledge.
So here it is, a guide on the simple things that make for a great photograph – using just your phone’s camera.
We’ll go over 3 basic tips that make for a good photo of even the most humble homestyle meals.
(And before you ask, none of the pictures below are edited.)
#1 Lighting
Natural light and direction of light
If there’s anything as essential as salt to food, it’s what lighting is to a good photograph.
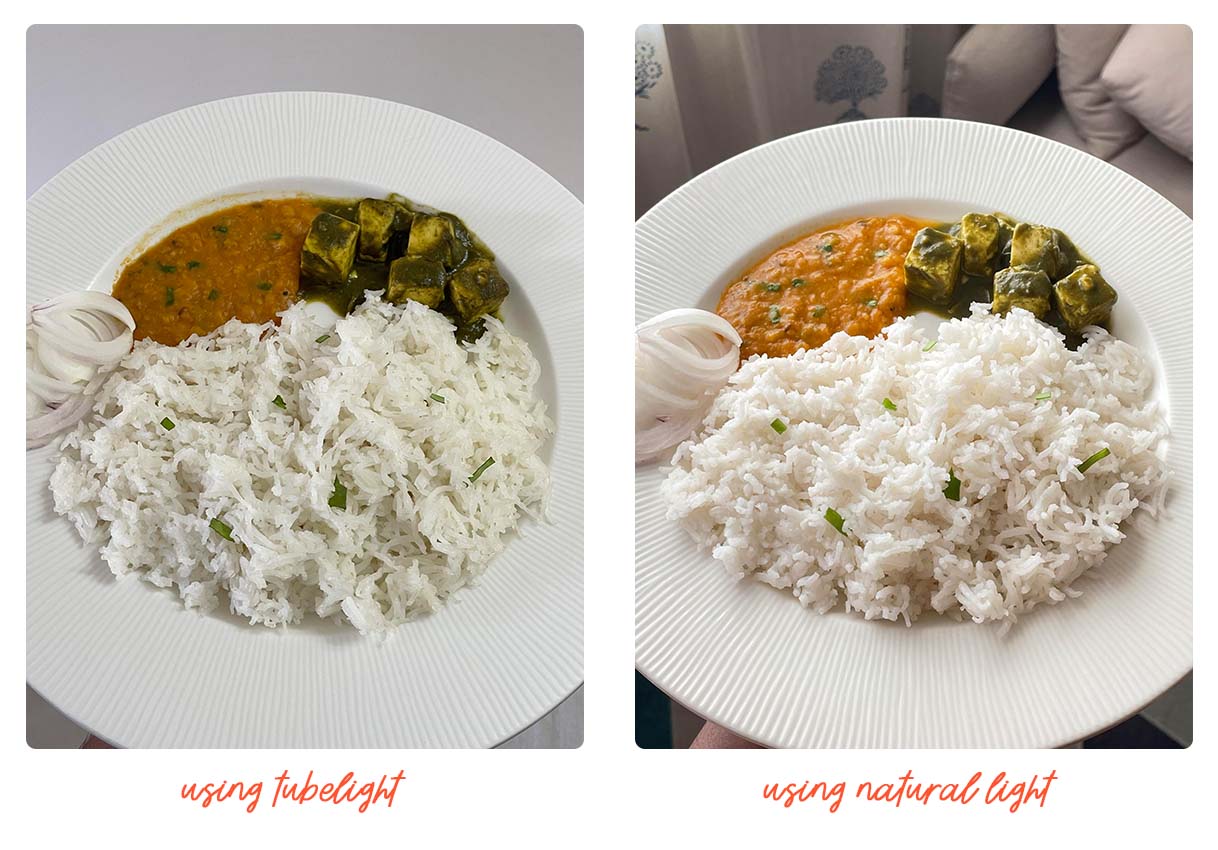
Use natural light when clicking pictures of food – it’s beautiful and it’s free.
Take a look at the pictures below to see the difference for yourself – the one taken with an indoor house light looks dull and flat while the one taken using natural light looks fresh and has more depth and dimension to it.
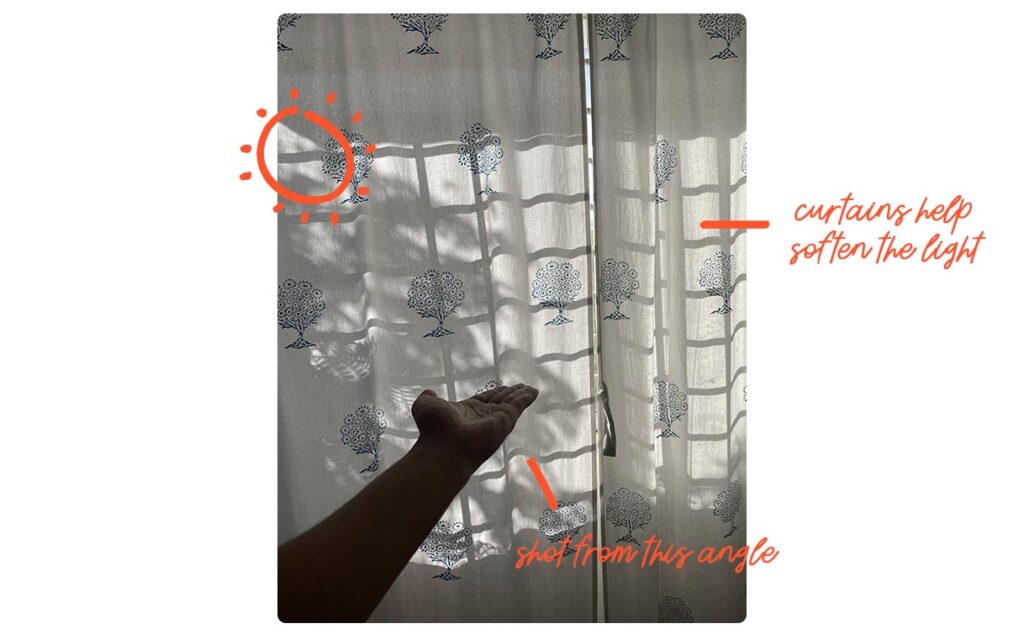
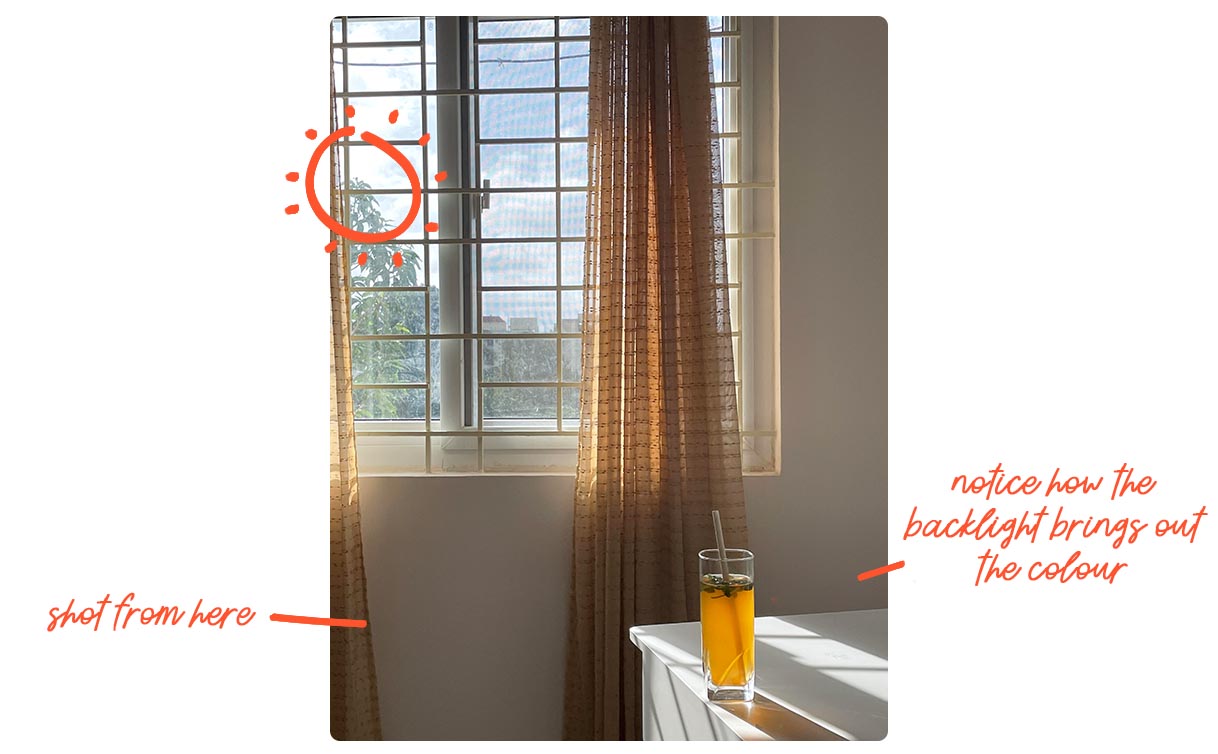
Once you’ve gotten close to the nearest window at home, hold your plate/food between the window and your phone.
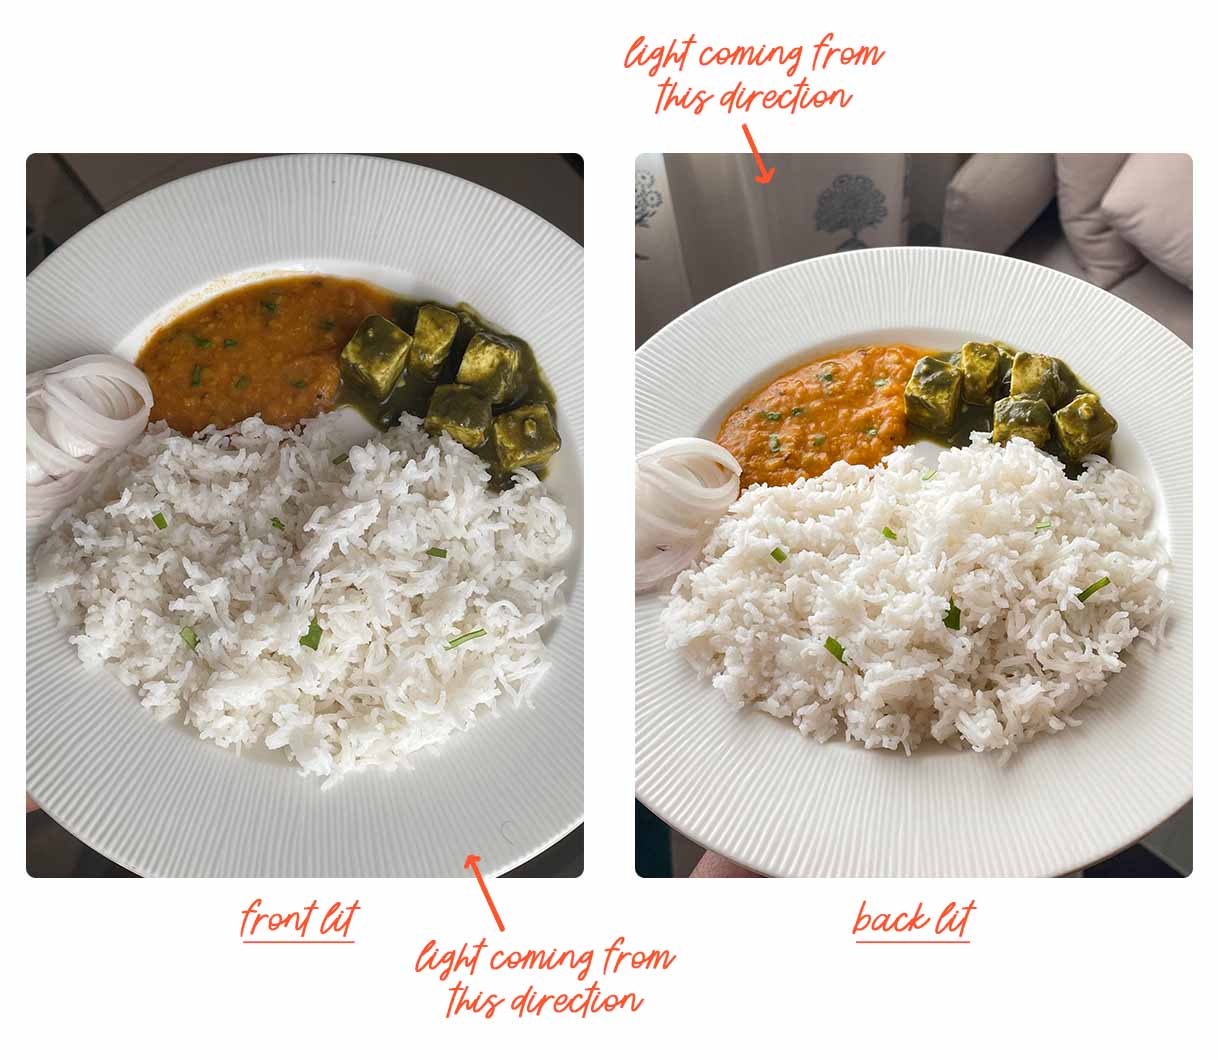
The photo where the sunlight is coming from behind the plate, i.e., the backlit photo, makes the food look delish! Light falling from the back of your plate will always add more depth to your photograph and make it look appealing. Lighting it from the front will make it look dull and flat.
#2 Tell a story
A picture that speaks a thousand words
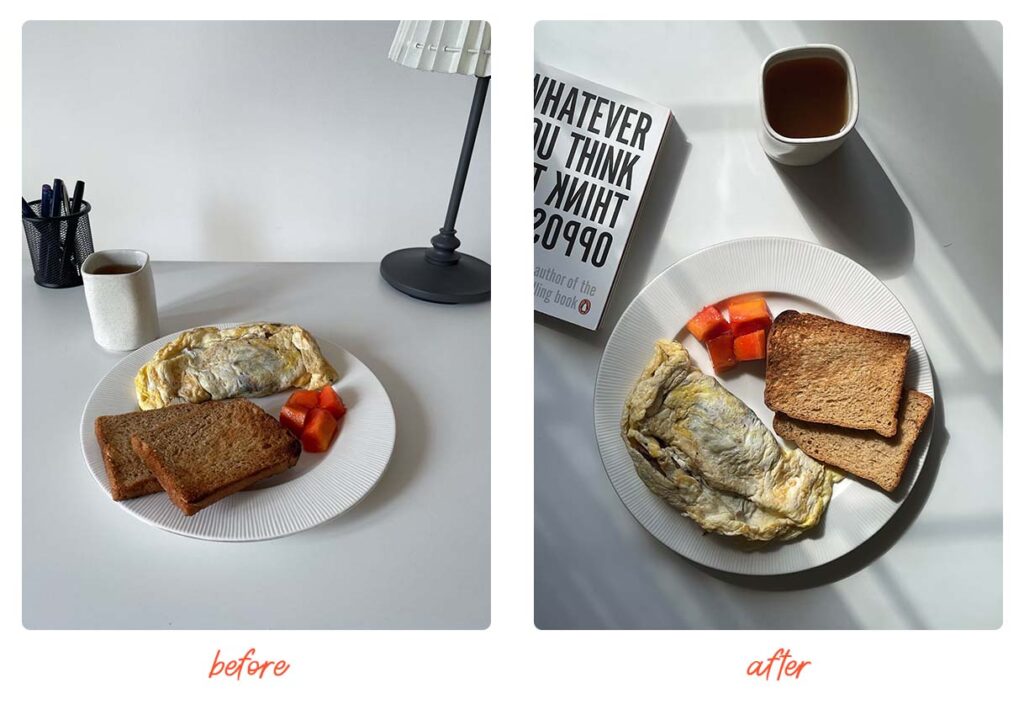
We often click pictures of our food to share a moment in time with our friends, so include all the props you’d like in your photo to do justice to that moment.
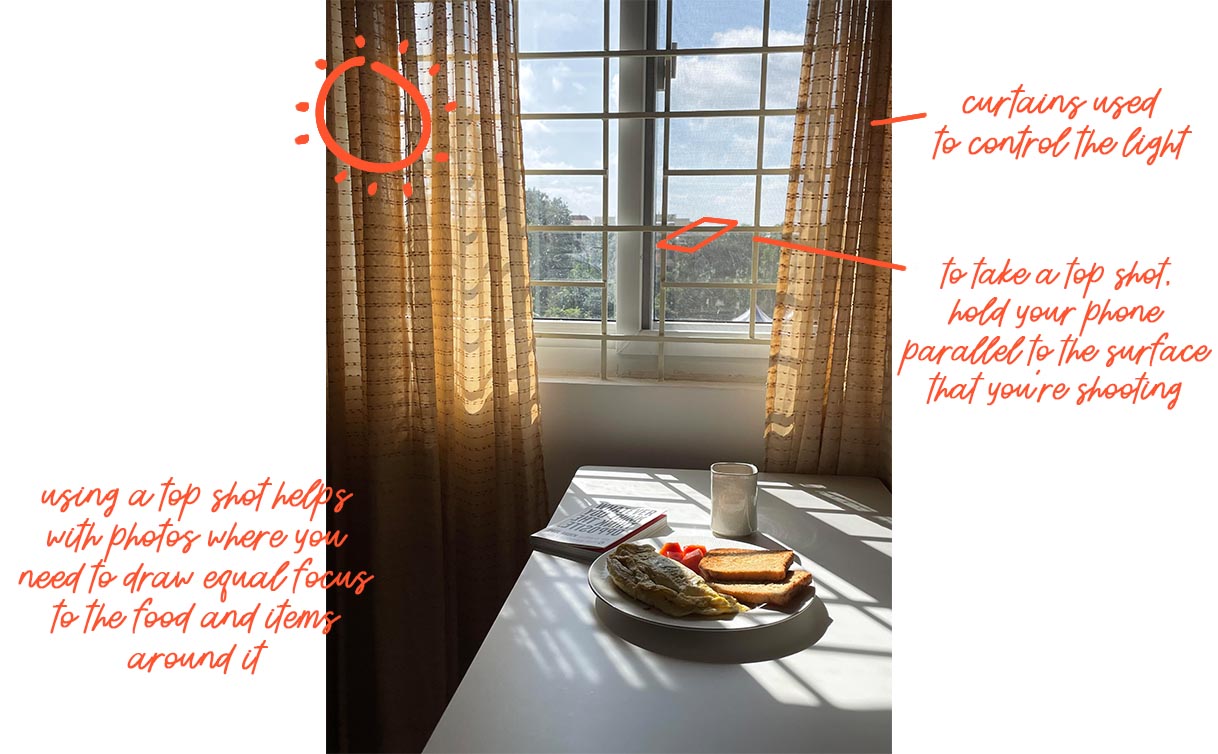
#3 Create layers
Light, texture and colours
The main goal while creating a good picture is to add as much depth and layers to your image as possible.
Quick lesson: Wonder why ‘portrait mode’ on your phone makes every portrait look better? It simply adds depth to your photos.
Now, let’s look at a couple of other ways we can do this while clicking a photo.
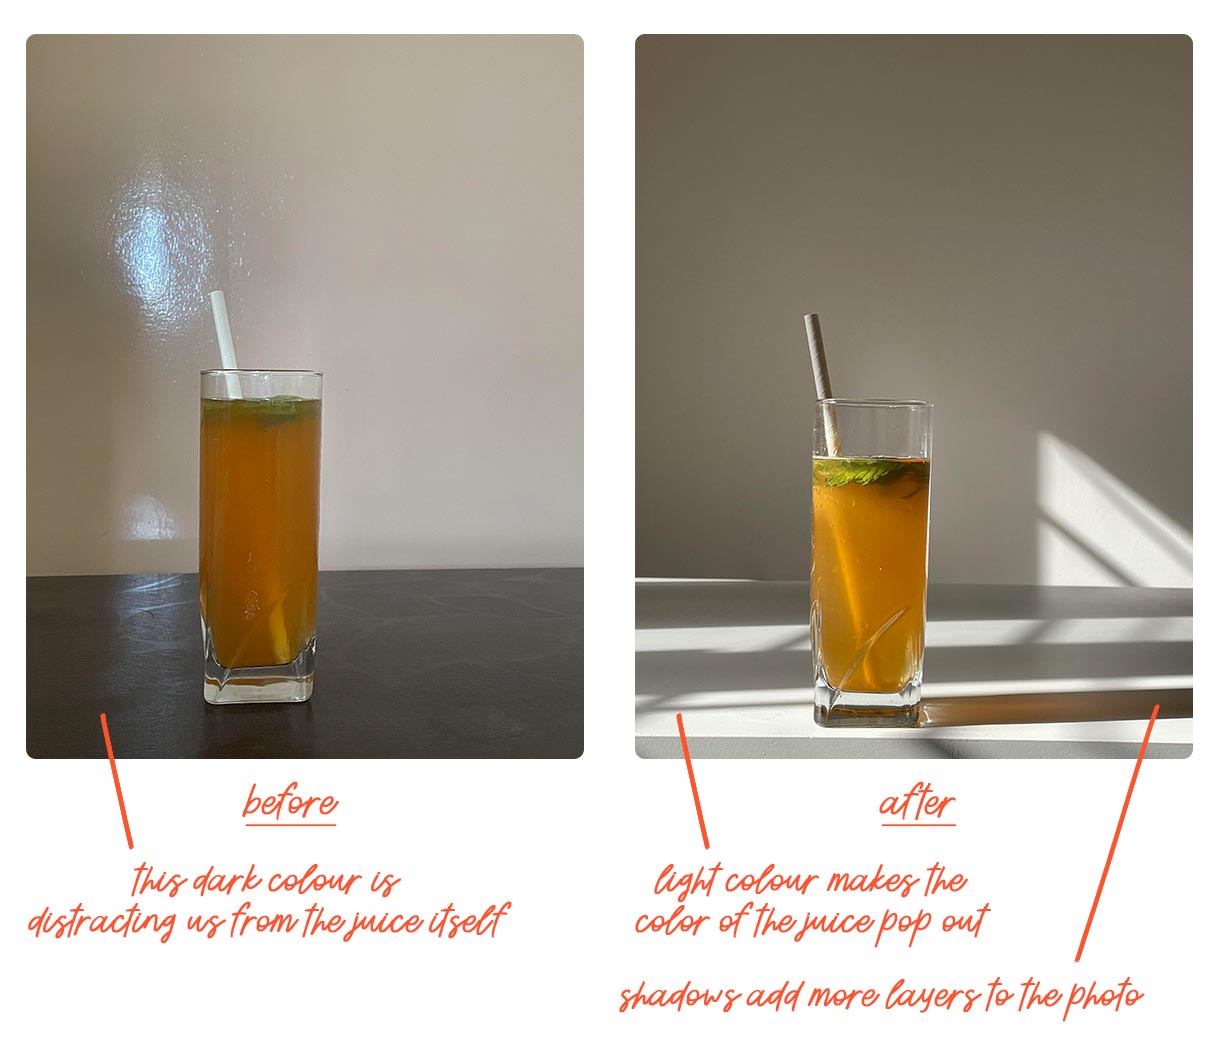
By carefully selecting the colours you feel should ‘pop’ in your photograph, you can naturally draw focus towards it and separate it from the background. The lighting adds depth by creating shadows – it defines the placement of the glass. Other ways to add layers is by use of foreground and background elements or simply add your hands to the shot!
These tips apply to just about any food you photograph, so you can continue to use these once you step back into your favourite restaurants, too!
Now pat yourself on the back, ‘cause you just learnt how to level-up your photography game!
Tag us with #ShootWithSwiggy if you’re uploading any photos that our guide helped you with – we’d love to see your culinary genius.
(PS: Here’s hoping your family chat groups will get a break from all the forwards with a photo of how good your lunch looks ?)


")


")


")
")

")

")

")
")


")
")
")

 (1)")


")


")


")
")


")


 (2)")
")


")


")
 (1)")

")

")


")


")

")


")